Effortless and delicious, this 4-ingredient no-knead bread comes together in under 4 hours! If you're new to bread baking, this is the perfect place to start. With just 10 minutes of prep and no kneading required, simply let the dough rise, then bake until golden brown and crisp on the outside, yet soft and chewy inside.

Baking bread can be intimidating. It may seem like a complicated process, but it's honestly quite simple, especially this no-knead recipe! If you're a first time bread maker then this recipe is for you!! You'll impress yourself and everyone who eats it! I promise.
And I wasn't kidding when I said it only takes 10 minutes of prep time. Yes, you do still have to wait for the dough to rise, about 2-3 hours, but that doesn't require any physical work on your end. Once the dough has doubled in size, transfer it from the bowl to a parchment lined dutch oven and bake!
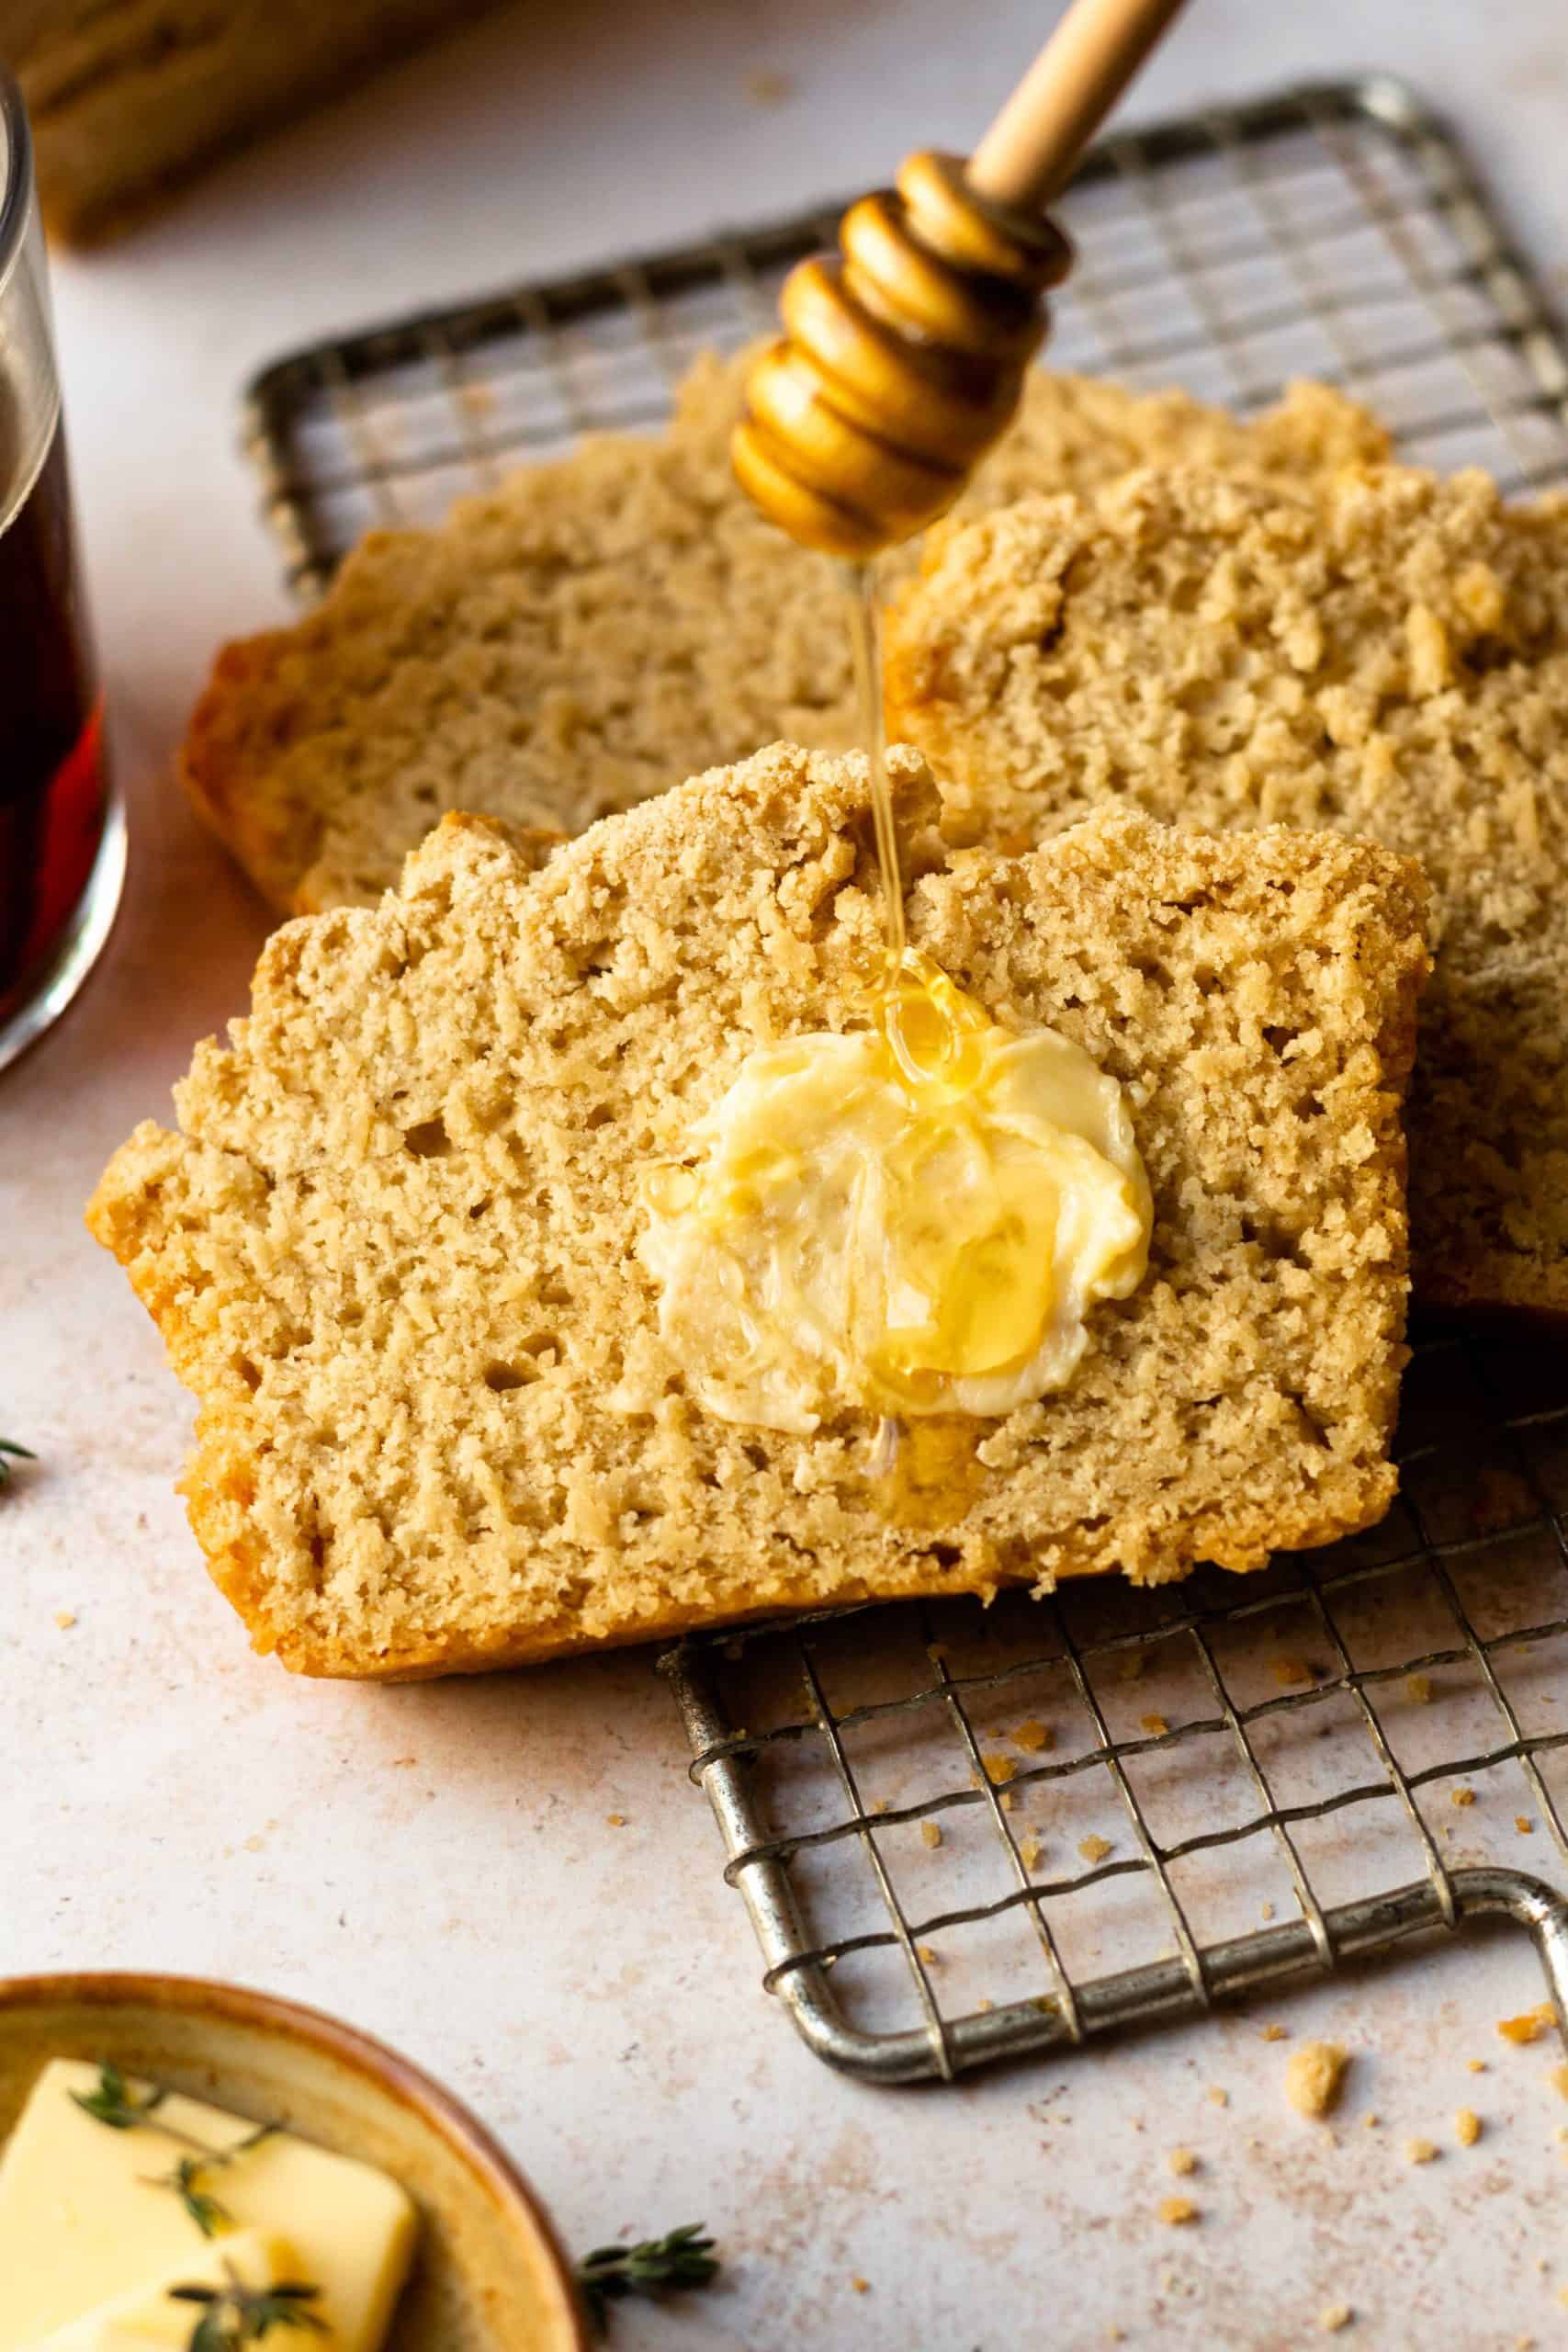
This no-knead crusty bread is seriously perfect for so many things! Dipping in soup, making grilled cheese, serving with eggs, toasted with butter and honey... the options are endless.
This is soo tasty and easy - my family now requests it almost weekly! - Jacque

Why you'll love no knead bread
- Quick and simple. This is honestly the quickest and easiest homemade bread recipe, and it tastes amazing! What's not to love!?
- Beginner friendly. This recipe is practically foolproof and the perfect place to start if you want to learn how to bake homemade bread. Your family will love it! And the more loaves you bake, the more comfortable you will become.
- Healthier than store bought bread. This bread is made with just 4 simple ingredients: flour, water, yeast and salt. Compare that to the mile long ingredient list that you'll find for any store bought bread.
What is no knead bread?
No knead bread is meant to be a quick and simple way to make delicious crusty artisan bread without all the extra bells and whistles and, as the name says, without kneading the dough. It's meant to be rustic, easy and very beginner friendly. It's a fast way to get a homemade loaf of bread on the table.
Traditionally, you knead bread dough using your hands (or a dough hook attachment on your stand mixer) until the dough becomes smooth and elastic before you let the dough rise. But, no knead bread skips that step!

Only 4 ingredients needed
- Bread flour. I recommend bread flour, but if you're in a pinch you can get away with using all-purpose flour. Bread flour has a higher protein content, giving the bread that more soft and chewy texture we all love when it comes to crusty bread!
- Instant yeast. For a quick rise I use instant (quick rise) yeast. I provided instructions in the notes section of the recipe card for using active yeast, which will increase the rise time to about 12-18 hours - this is great for an overnight rise!
- Salt. Don't forget the salt! Once, I forgot to add salt and the bread was NOT good. I ended up throwing it away. It's amazing what salt adds to the recipe. So much flavor. Without it, all I could taste was yeast.
- Water. The water should be between about 110-120 degrees F. If the water is too cold the yeast won't activate. If the water is scalding hot it will kill the yeast. BUT, don't let that scare you. The temperature doesn't have to be exact. You just want the water to be about the temperature of warm bath water.
Tips & tricks
- Spoon and level the flour. As always, I recommend using a spoon to scoop the flour into the measuring cup and then level it off with a butter knife. Scooping your measuring cup directly into the flour packs it in too tight and you'll likely end up with too much flour. Too much flour = dry bread.
- The temperature of your home will determine how quickly the dough rises. Cooler temps will result in a longer rise time, while a warm environment will cause the dough to rise faster. If my house is chilly during the winter months, I like to turn my oven on to the lowest temperature for 1-2 minutes then turn it off and place the bread dough inside. This gives the dough a warm place to rise. You could also set the dough next to a warm air vent in your house. Don't be afraid to get creative, if need be!
- Refrigerate the dough if time allows. Once the dough has doubled in size, place the covered dough in the refrigerator for up to 12 hours to enhance the flavor of the bread. This is also a great make ahead option! But, if you don't have time, that's perfectly fine too. I've baked this bread plenty of times without refrigerating it first.

Commonly asked questions
What if I don't have a dutch oven?
You can still make the bread! The reason behind using a dutch oven to bake bread is that it locks in steam, allowing the center of the bread to rise and evenly bake without the outside of the bread cooking too fast (otherwise the outside would burn and the center of the bread would still be doughy). Removing the lid during that last 10-15 minutes lets the steam release, allowing the bread to get its crusty, golden exterior.
But, if you don't have a dutch oven, here is a good article I found on different ways to create steam in your oven without one: How to Make Crusty Bread without a Dutch Oven. But, I highly recommend buying a dutch oven if you plan to make baking bread a regular thing. You can also use your dutch oven to make roasts, soups and stews. Click here to check out the dutch oven that I have and love! I like Lodge because their prices are reasonable and the quality is good.
How do you shape no knead bread?
There's no one way to shape no knead bread and it certainly doesn't need to be perfect. No knead bread is meant to be simple and rustic. But, here's what I like to do. Stretch the dough into a rectangle shape then fold the ends over the center, roll it up, and use my hands to shape it into a ball and create a little surface tension. In this video I show you how!
Can I use active yeast?
Yes! You can definitely use active yeast in place of instant yeast, but please keep in mind that the dough will also take much longer to rise with active yeast, about 12-18 hours at room temperature.

Recipe variations
Inclusions are a fun way to kick up the flavor in your bread! Once your dough is combined and shaggy, mix in your inclusions, using your hands if needed. Here's a few ideas!
- Jalapeno cheddar. 2 cups shredded cheddar cheese and 1 diced jalapeno.
- Cinnamon raisin: 2 tablespoons brown sugar, 1 tablespoon cinnamon and ¾ cup raisins.
- Rosemary: 1 tablespoon of dried rosemary.
- Chocolate chunk: ¾ cup dark chocolate chunks or chips.
The options are endless! Get creative!
Storing
Storing at room temperature
Before the bread is sliced, it can be stored at room temperature for 1-2 days uncovered. Once you slice into the bread, store in a plastic resealable bag for up to 3 days at room temperature. Although the outside of the bread will lose its crusty texture, the inside will stay nice and soft.
Freezing
You can freeze a whole loaf or slice the bread first. Wrap the bread in plastic wrap then place inside a resealable plastic bag and freeze for up to 3 months. Let thaw in the plastic bag at room temperature. Thawing in the bag helps the bread retain its moisture.
If desired, you can reheat the bread in the oven once it has thawed. To do so, wrap the bread in aluminum foil and place in the oven at 350 degrees for 10-15 minutes or until warm.

More recipes you'll love!


Did you try this recipe?
I'd love to hear from you! Leave a ⭐️⭐️⭐️⭐️⭐️ rating and comment below. I appreciate your helpful feedback! Follow me on Instagram, TikTok, Facebook and Pinterest for more delicious recipes!
Thanks so much! - Rachel
Easy No-Knead Crusty Bread
Ingredients
- 4 cups bread flour (or all-purpose flour*)
- 2 ¼ teaspoons instant yeast (1 packet) see notes for active yeast
- 2 ½ teaspoons salt
- 2 cups warm water (110 - 120°F)
Instructions
- In a large bowl, mix together the flour, yeast and salt.
- Pour in the warm water and use a sturdy spoon to mix together until fully combined. The dough should be wet and shaggy, but not runny.
- Cover the bowl with plastic wrap and let rise for about 2-3 hours, or until doubled in size.
- Optional: once the dough has doubled in size, you can store it covered in the refrigerator for up to 12 hours for enhanced flavor development, or continue to follow the instructions below to bake right away.
- When you're ready to bake, place the dutch oven with the lid on into the oven and preheat the oven to 450°F.
- Once the oven is preheated, lighlty sprinkle a work surface with about a tablespoon of flour. Scrape the dough out of the bowl onto your floured surface and roughly shape into a ball. No need for it to be perfect. It'll look nice once it bakes. Place the dough ball seam side down on a sheet of parchment paper.
- Once the oven is preheated, remove the hot dutch oven and transfer the parchment paper with the dough to the dutch oven. Cover with the lid and bake for 30 minutes. Remove the lid and bake an additional 10-15 minutes until golden and crispy on top.
- Lift the parchment paper with the bread from the dutch oven and let cool for 1 hour, then slice and enjoy!
Notes
Using active yeast:
Ingredients:- 4 cups bread flour (or all-purpose)
- ¾ teaspoon active dry yeast
- 2 ½ teaspoons salt
- 2 cups warm water
- Follow instructions above through step 2.
- Cover the bowl and place in a warm spot. Let rise overnight, about 12-18 hours.
- Resume with step 5 above.
*All-Purpose Flour:
- Bread flour has a higher protein content, giving the bread that more soft and chewy texture we all love when it comes to crusty bread! So, for the best results, I recommend bread flour, BUT all-purpose flour will still work and your bread will still taste delicious! So, use all-purpose if that's what you've got!
Nutrition
Nutritional information is automatically calculated by a third party software and is only an estimate, not a guarantee. This information is provided as a courtesy, and you are solely responsible for all decisions related to your health.


Judy says
Can you leave bread in refriger
ator longer than 12 hrs?
Georgia Stack says
I love the 4 ingredient
Crusty bread recipe. You can’t go wrong or mess it up! Excellent recipe if you’re a beginner!
Rachel Kochlin says
Thanks so much, Georgia! I truly appreciate you taking the time to leave a review!
Amy says
Looks great! Question :If I do half the dough amount , do I still cooked it for 30 min ?
Rachel Kochlin says
Great question! I haven't tested the recipe using half the dough amount, but I would try baking with the lid on for 20 minutes, then remove the lid and continue baking another 5-10 minutes until golden brown. You can also check the internal temperature of the bread using an instant read thermometer. It should read about 205-210 degrees F in the center when it's done baking. Hope that helps!
Merideth says
What size dutch oven do you use?
Rachel Kochlin says
Hi Merideth! I recommend at least a 6 quart.
Steve Hale says
I tried this recipe for my first attempt at baking bread. Easy to follow and the bread is delicious. It has been our primary bread for several months now. I just found your recipe for no knead whole wheat bread, I will be trying that soon. Thank You.
Rachel Kochlin says
I love that this has been your go-to bread recipe for so long!! P.S. I don't have a whole wheat no-knead bread recipe on my website, so I'm not sure which recipe you're referring to, but I truly appreciate you taking the time to leave a review!!
Nancy Carlson says
Looking forward to making your bread recipes. What kind of salt is used in recipes?
Thank you for your time and sharing your recipes.
Rachel Kochlin says
I like to use pink salt or sea salt. I hope you love the recipe!