Simple sourdough bread recipe that is great for both beginners and experienced sourdough bakers! With just 35 minutes of hands-on time and an overnight rise, I created an easy, uncomplicated method of overnight sourdough bread. It's light, fluffy, chewy and flavorful on the inside with a crispy, golden crust.
You guys have been asking, so I am finally sharing my sourdough bread recipe! It works exceptionally well for me, and I know you're going to love the results too.
If you're new to sourdough baking, please don't be intimidated! I know there are quite a few terms and techniques to learn, but after a few loaves, you'll really start to understand the process and feel more confident. To make things easier on you, in this post I broke down all the terms you need to know and provided step-by-step instructions with photos!
If you have any questions about my sourdough bread recipe, leave a comment or message me on Instagram!
With your leftover sourdough discard, you absolutely have to make my homemade sourdough discard tortillas! They are the softest and most flavorful tortillas you will ever eat!! And if you're craving something sweet, my fudgy sourdough brownies or sourdough banana bread are both favorites of mine.
Jump to:
- What is Sourdough Bread?
- What is a sourdough starter?
- How do I make a sourdough starter?
- What equipment do I need?
- Sourdough terms
- How to make sourdough bread (step by step overview with photos)
- Frequently Asked Questions
- Sourdough bread baking tips
- Troubleshooting
- Storage
- Sourdough bread baking schedule
- Easy Sourdough Bread Recipe
What is Sourdough Bread?
Sourdough is naturally leavened bread, which means it doesn't use any commercial yeast to rise. Instead, sourdough bread rises naturally using a starter - fermented flour and water mixture that contains natural yeast and good bacteria. This fermenting process is what gives sourdough it's tangy flavor, chewy texture, airy crumb and crispy crust!
What is a sourdough starter?
Sourdough starter is used in place of yeast to make sourdough bread.
Sourdough starter naturally develops good bacteria and wild yeast that feed on the carbohydrates in flour when hydrated with water and allowed to ferment, which is where the phrase "feed your starter" comes in.
Creating a sourdough starter at home usually takes about 2 weeks. The process involves mixing together water and flour everyday until the starter is active, which means it's ready to bake with.
Once your starter is active, you can continue to feed it everyday if you plan to bake bread everyday, otherwise you can store your starter in the fridge and feed it once a week when you're ready to bake.
If you forget to feed your starter or you go on vacation, don't stress. Your starter will be just fine in the fridge for a few weeks without being fed. But, before baking with it, feed your starter 2-3 times to reactive it.
How do I make a sourdough starter?
There are a lot of great articles online that will walk you through how to make your own sourdough starter. Just do a Google search. I recommend making a sourdough starter when the weather is warm because starters like a warm environment. I also recommend finding a sourdough starter recipe that is fed with equal parts starter, water and flour. Those are two things I learned from my experience.
But, you do not have to make your own starter. If you know someone who has a starter, ask them for a cup. They will always have extra! Alternatively, you can buy fresh sourdough starter online! Here are a couple links:
What equipment do I need?
Despite what you may think, you don't need special equipment for this sourdough bread recipe! Below, I broke down the absolutely essential equipment that you need, and some fun optional equipment that you can collect along the way to enhance your bread making skills!
Essential equipment
- kitchen scale
- 4-6 quart dutch oven
- parchment paper
- mixing bowl
- kitchen towel
- sharp knife or razor blade
Optional equipment
- proofing basket, round or oval
- bread lame
- bench scraper/dough cutter
- dough whisk
- bread knife
Sourdough terms
What is sourdough crumb?
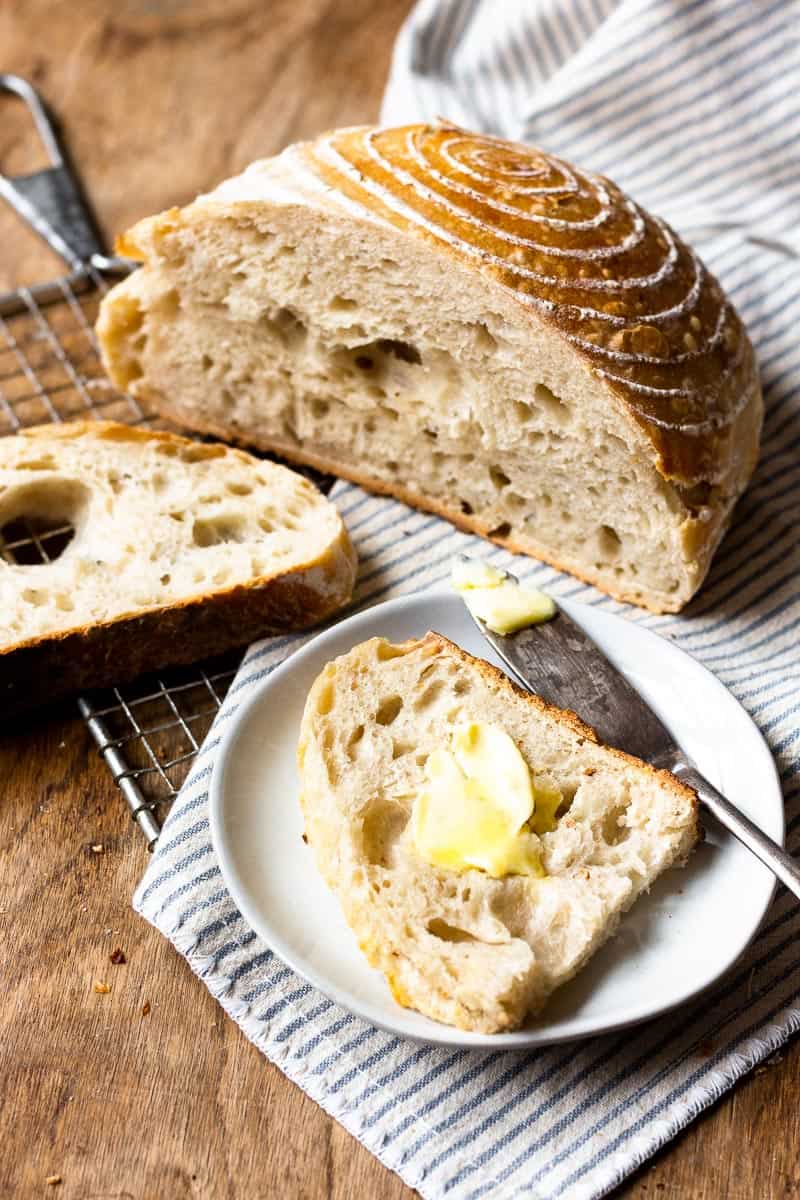
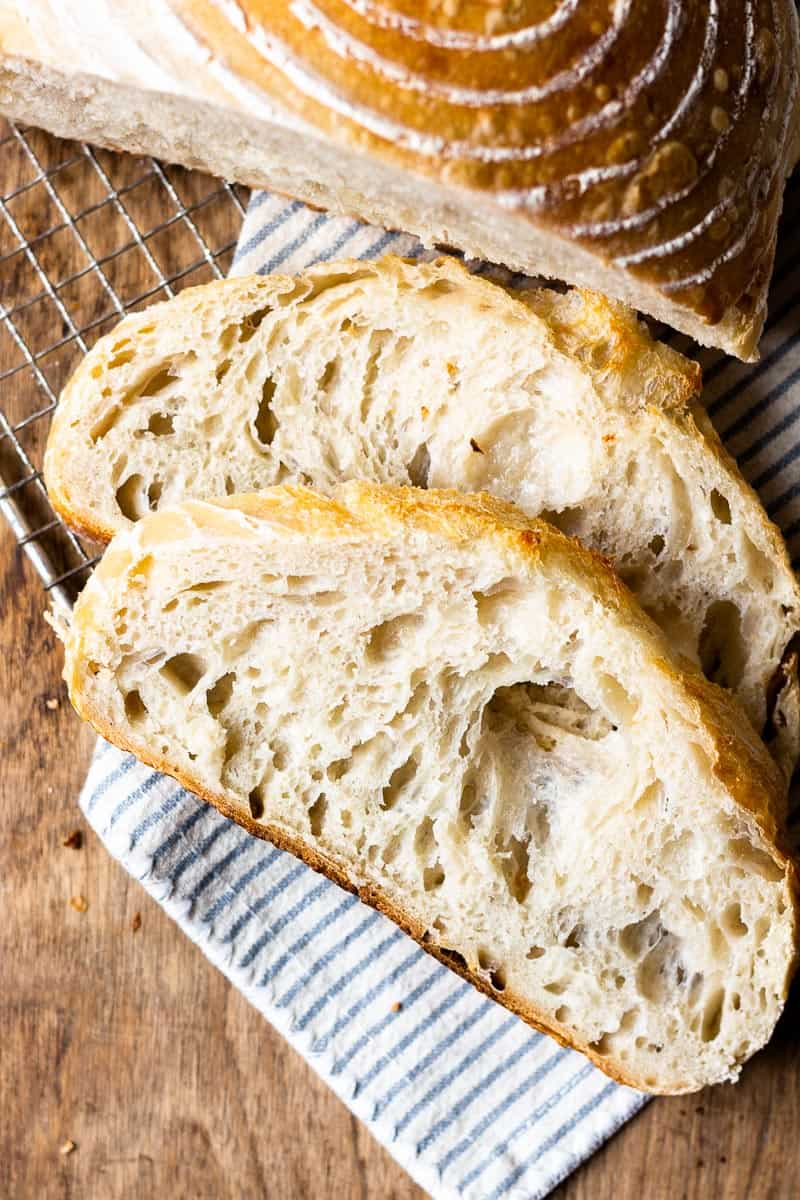
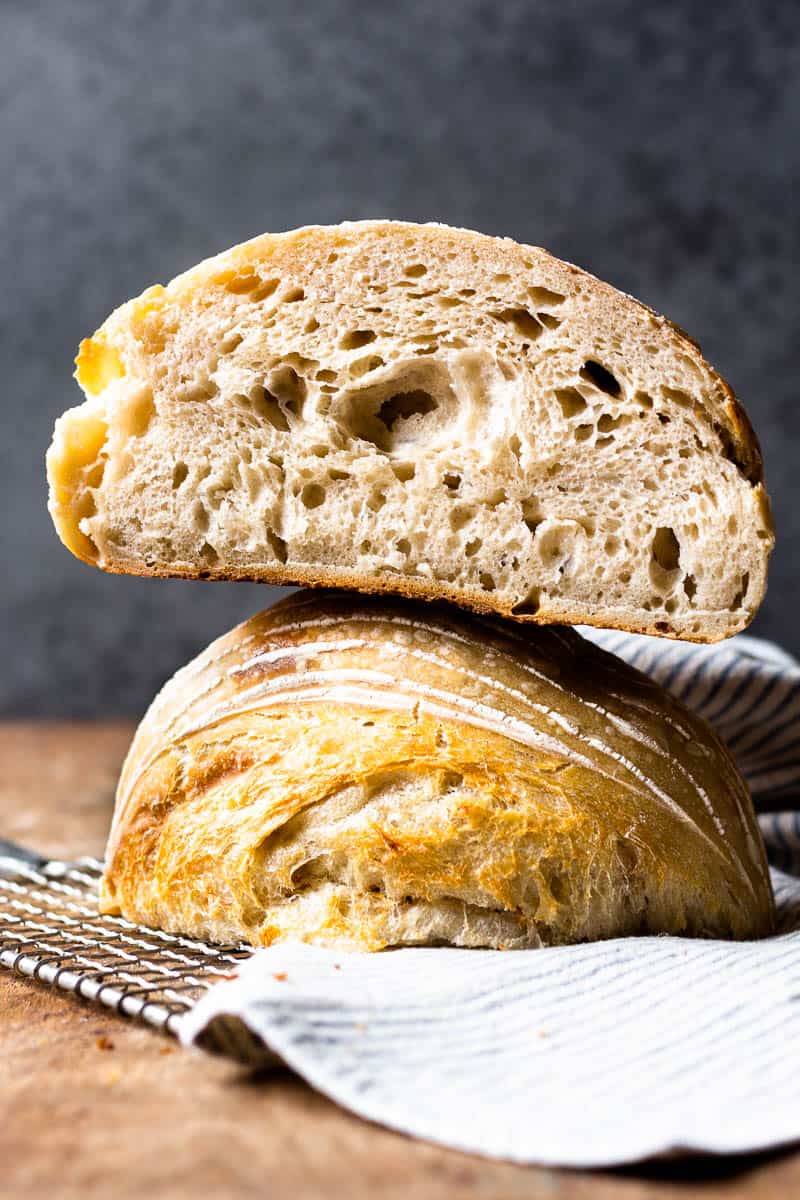
Crumb refers to the texture of the inside of the loaf, and is often referred to as "open" or "closed" crumb. Open crumb means the sourdough has large, open holes through the interior of the bread - this is typical of a traditional sourdough loaf. Closed or tight crumb loaves don't have all those big holes, instead the interior of the bread more closely resembles sandwich bread.
This sourdough bread recipe creates a loaf with an open crumb.
What is sourdough bulk fermentation?
Bulk fermentation is just a term for the first rise. During the first 2 hours of bulk fermentation, you will perform a series of stretch and folds, which help to activate the gluten, giving the dough strength.
During the remainder of the bulk fermentation, the dough will sit at room temperature until doubled in size.
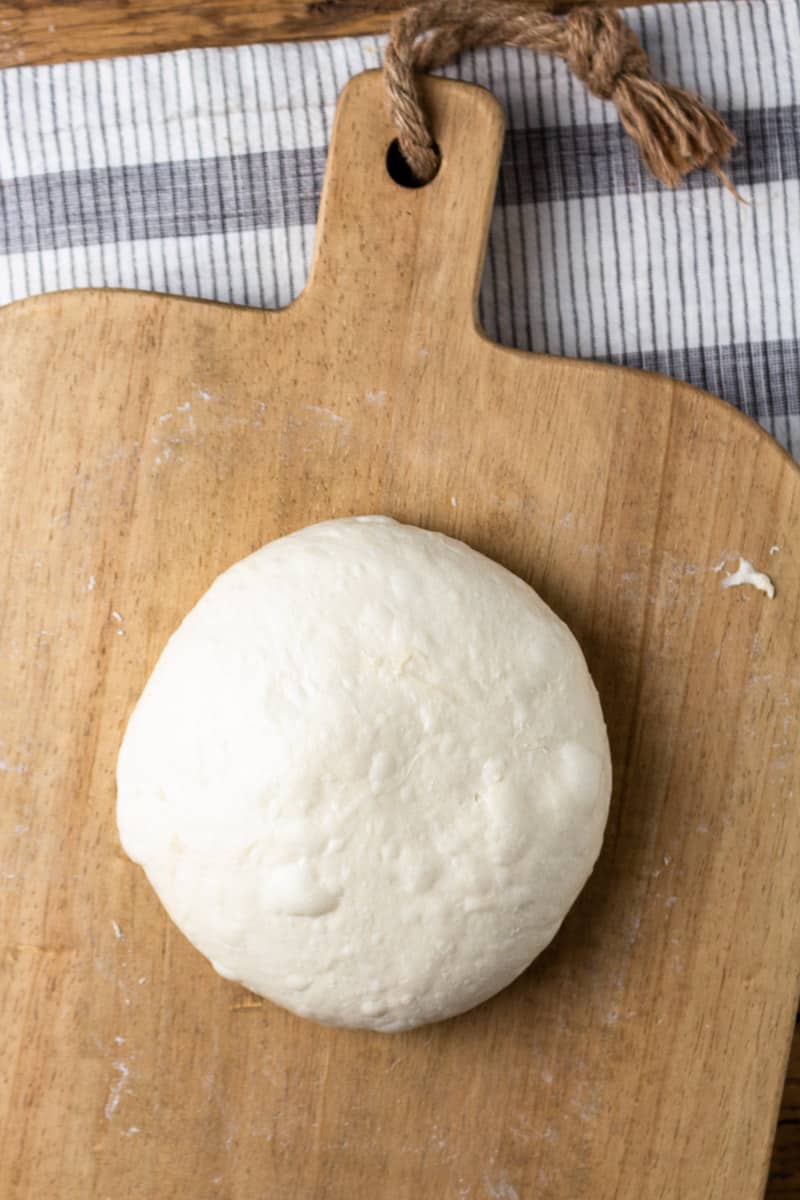
What is sourdough shaping?
Sourdough shaping is essentially taking the dough from a loose and shaggy to a well rounded ball. You can use your hands to shape the shape the dough and create tension, but using a bench scraper really helps!
The goal of sourdough shaping is to create a "skin" on the surface of the dough, creating tension and allowing the dough to hold it's shape while it bakes.
What is sourdough proofing?
When it comes to sourdough, proofing is a period of rest for the dough after shaping, but before baking. Proofing improves the flavor, texture and structure of the bread. Longer proofing will give you a more open, airy crumb (the holes in sourdough bread).
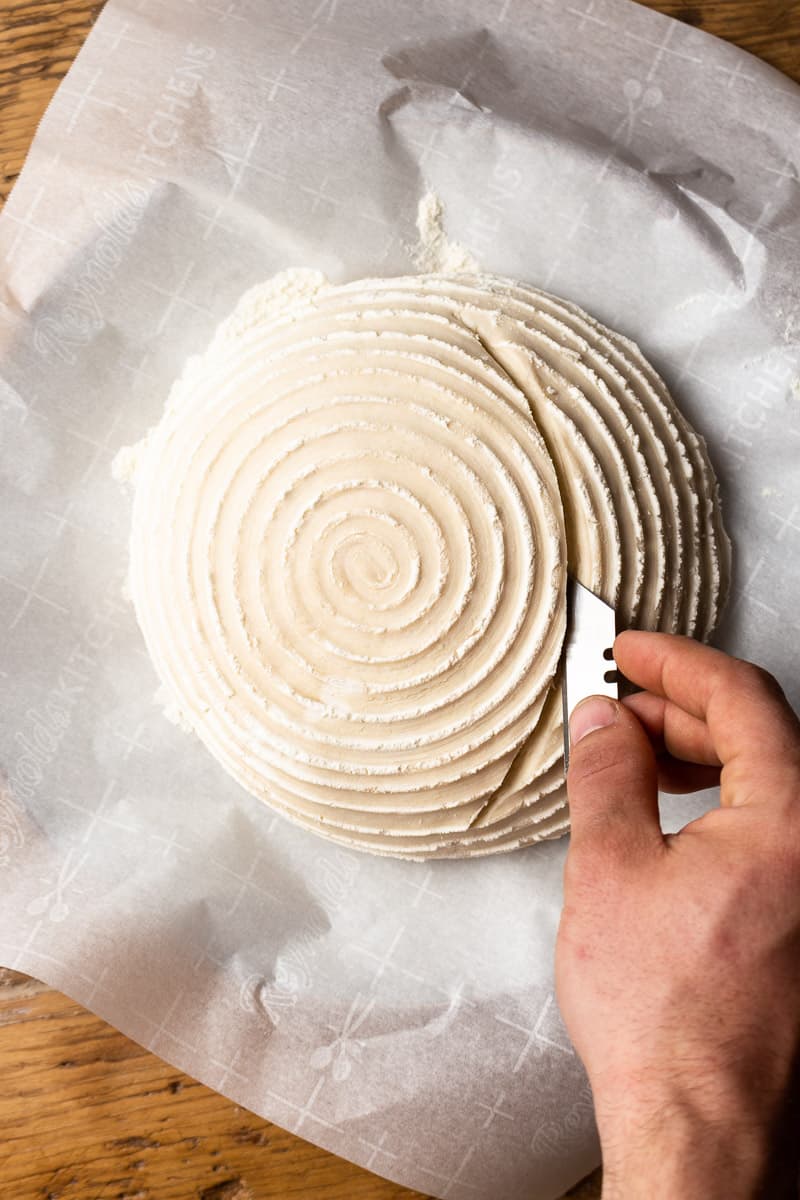
What is sourdough scoring?
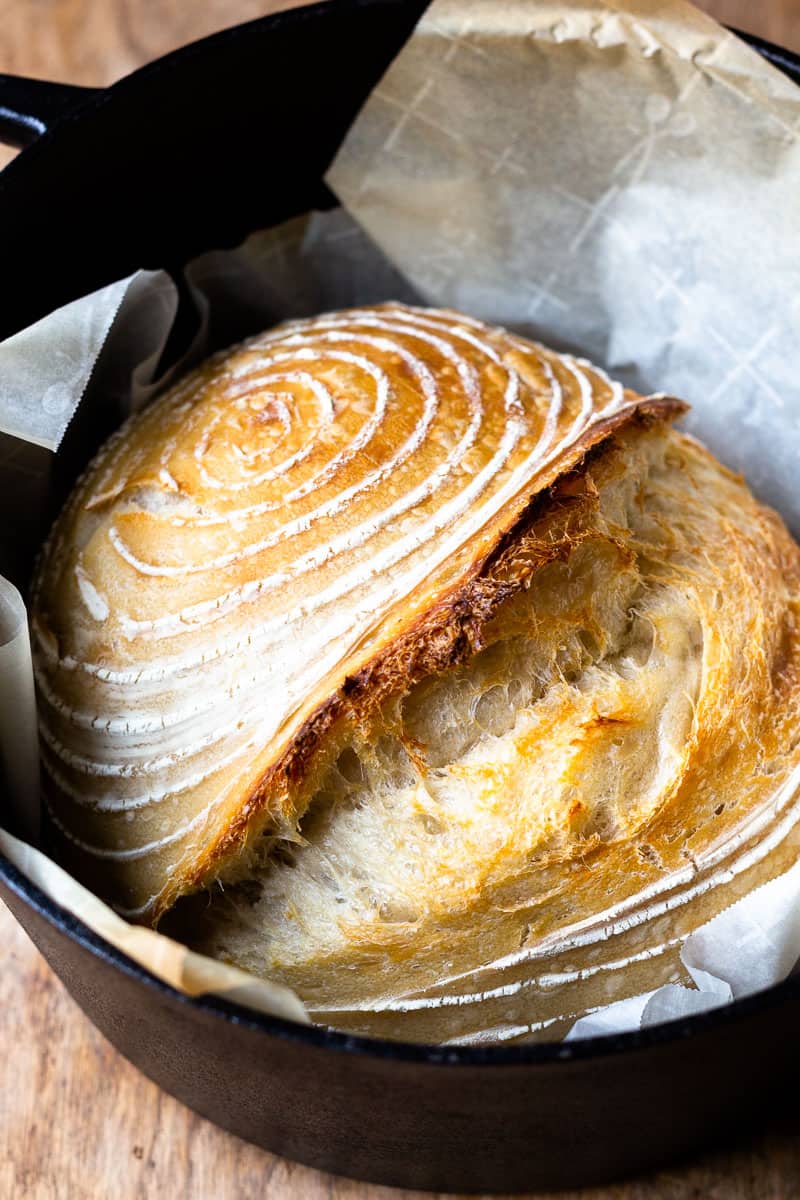
Cutting a slash into the dough using a sharp knife or razor blade to allow for expansion during baking. Bread dough rapidly expands in the oven (also known as "oven spring"), and scoring allows you to control where the bread expands.
You don't have to score the dough, but it will burst open as it bakes.
How to make sourdough bread (step by step overview with photos)
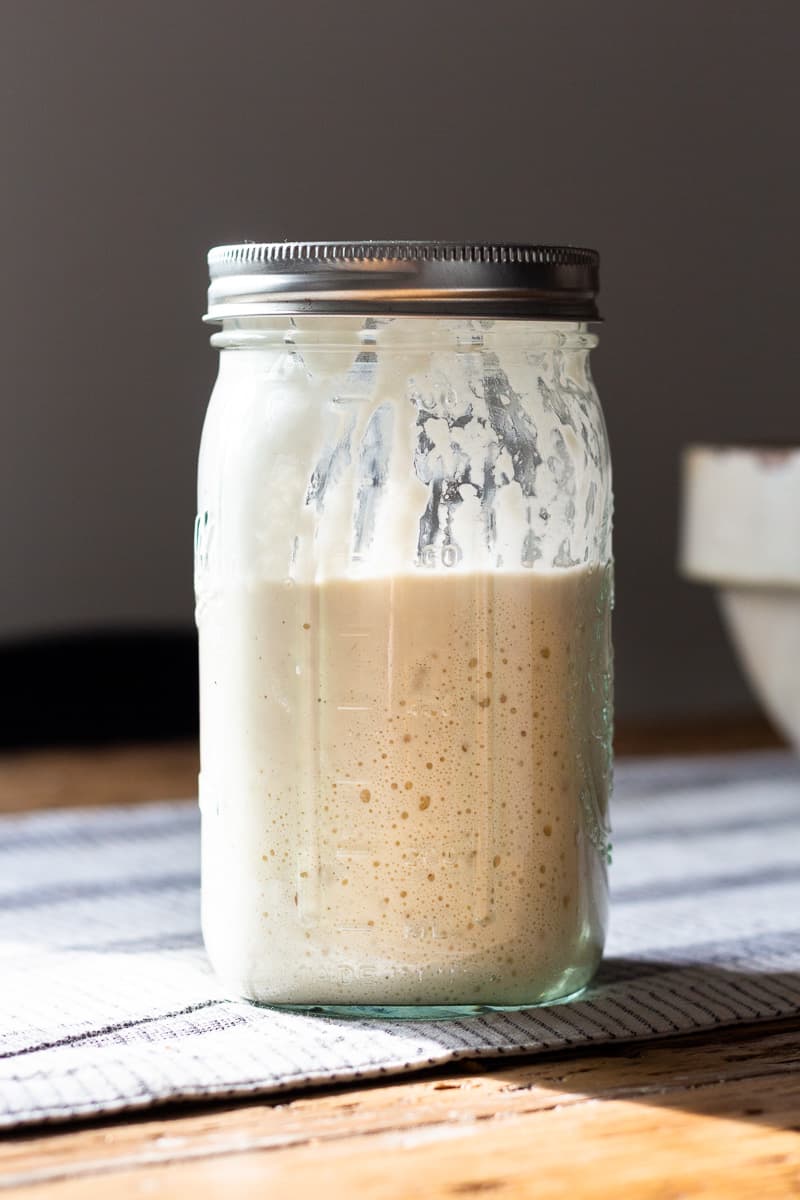
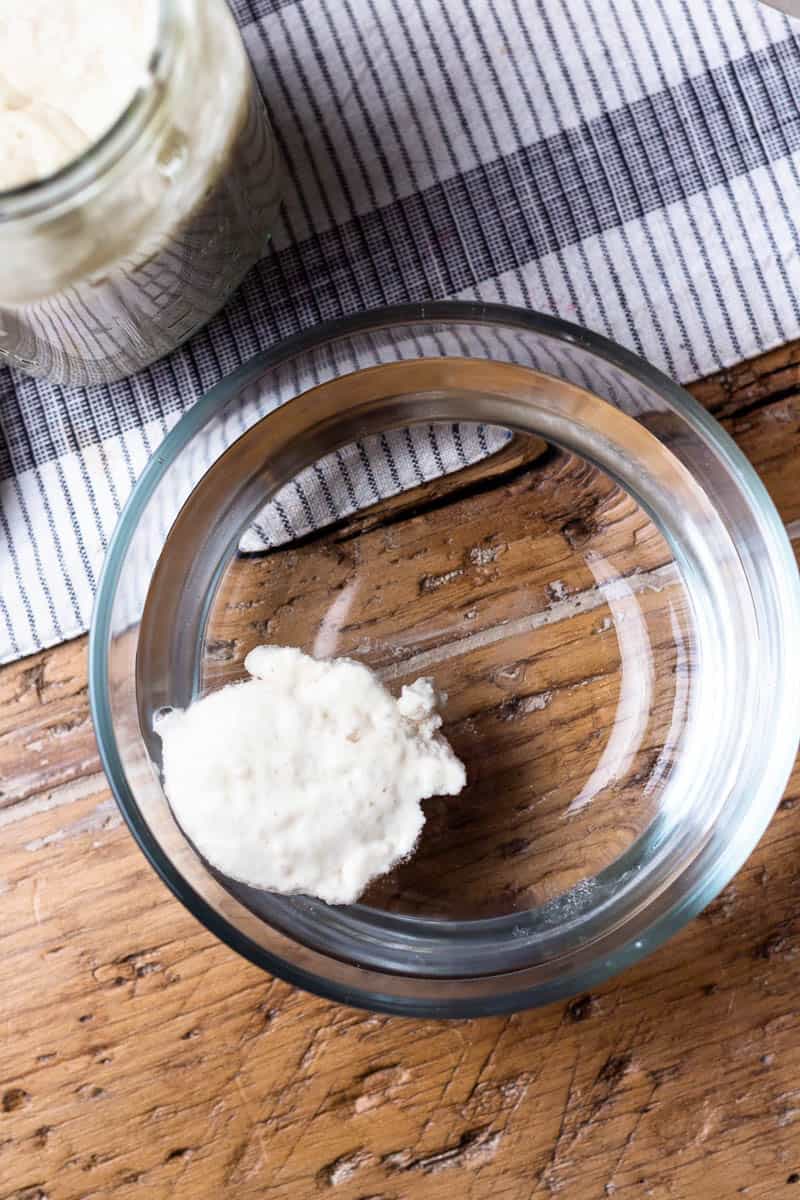
Step 1: Feed your starter.
Feed your sourdough starter, and let rise at room temperature until doubled in size, about 4-6 hours.
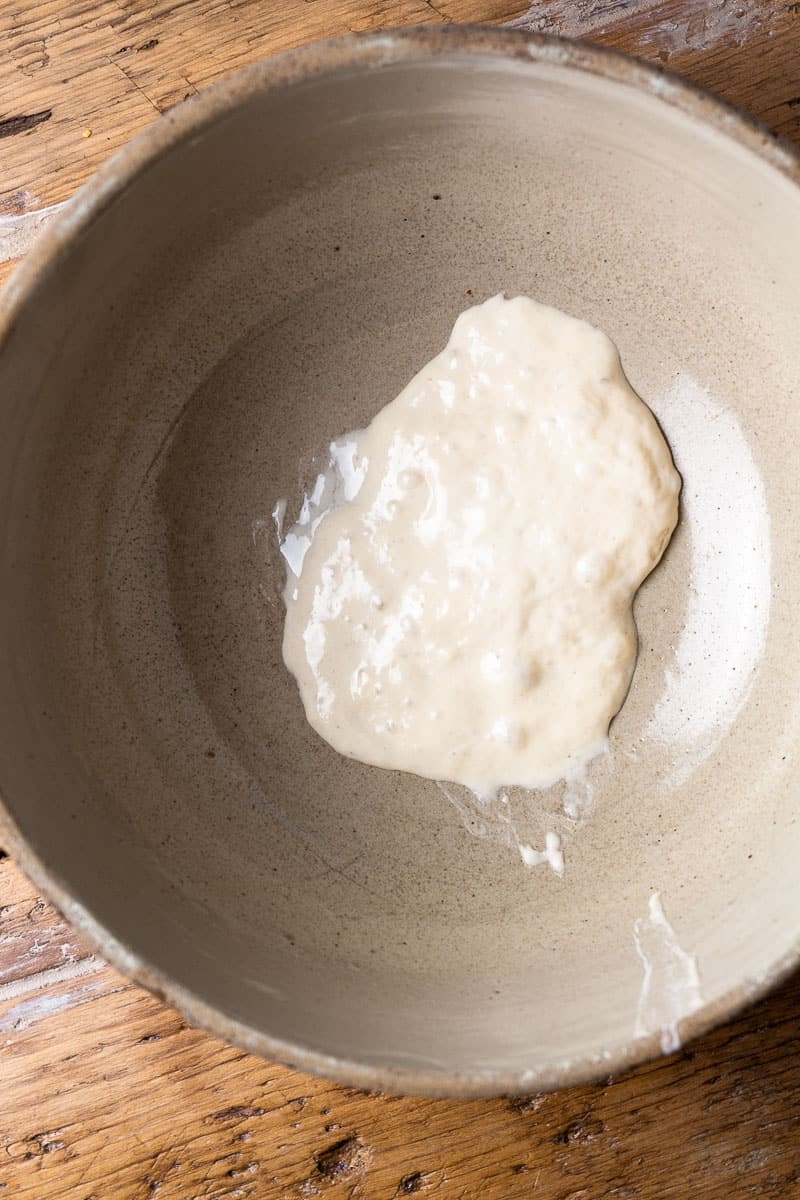
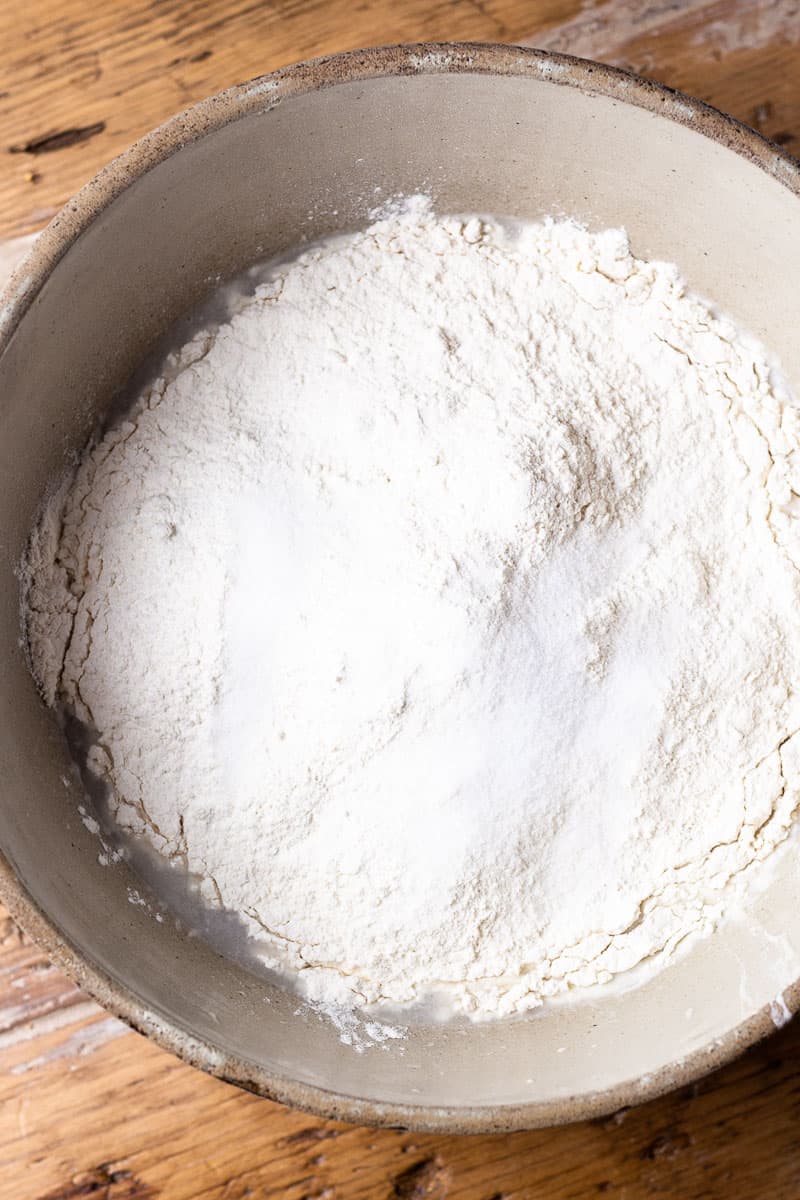
Step 2: Mix the dough.
Mix together the active sourdough starter, water, bread flour and salt until a sticky, shaggy dough ball forms. Let rest for 30 minutes.
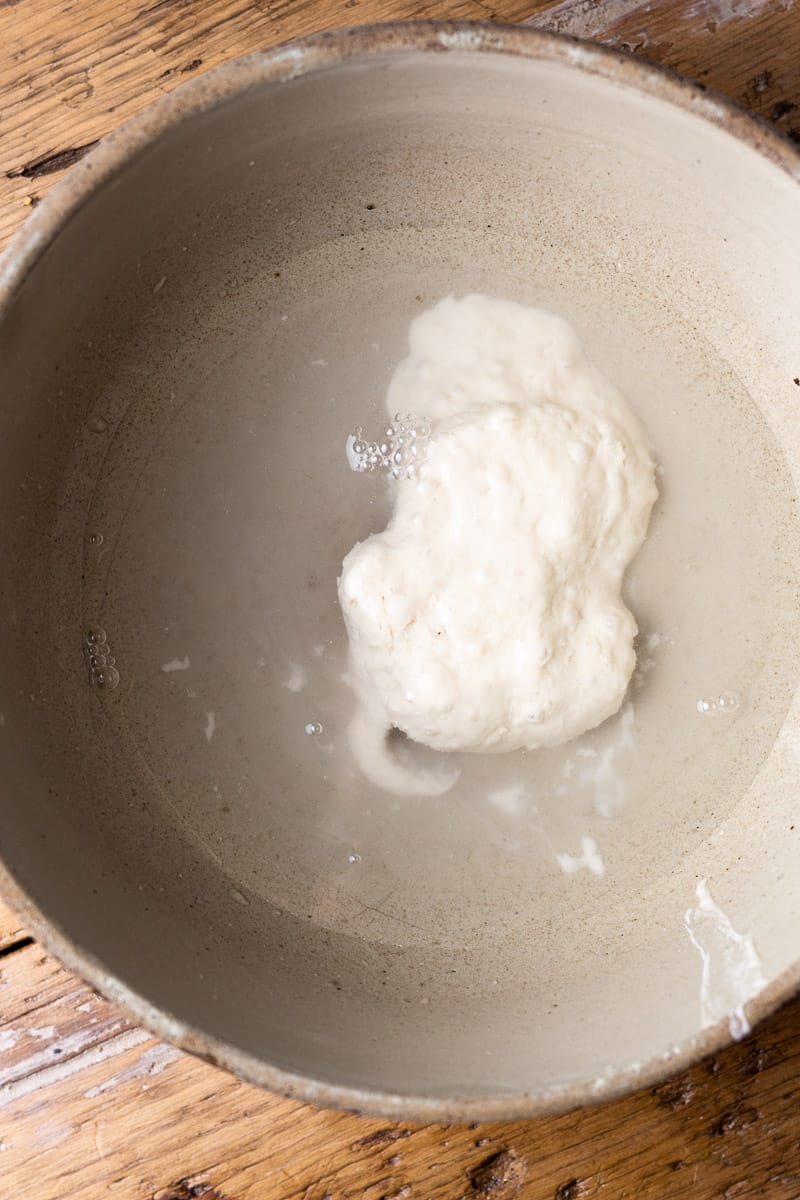
Step 3: Stretch and folds.
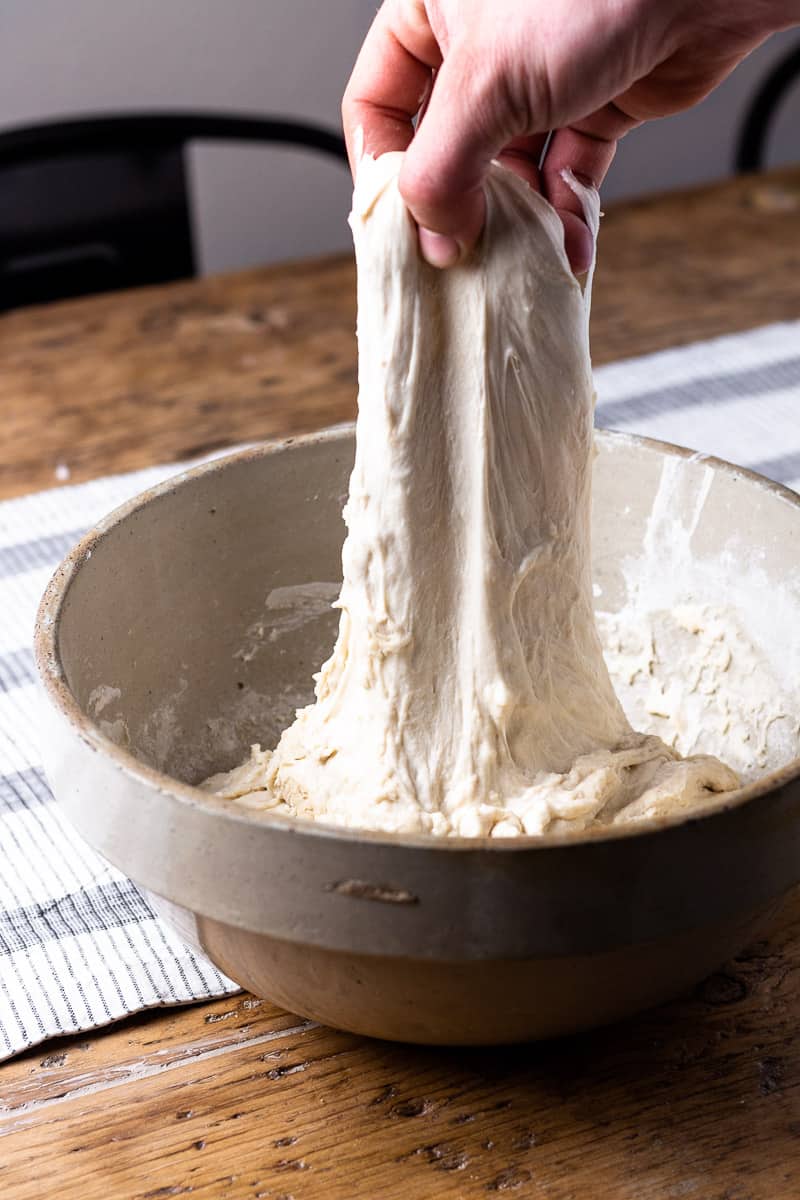
Perform a series of stretch and folds every 30 minutes for 2 hours (total of 4 stretch and fold series) to give the dough strength. To do so, grab under the top side of dough and stretch it up then fold it over the center. Quarter turn the bowl and repeat until you've performed the stretch and fold series on all 4 sides. The dough will tighten up as you go along.

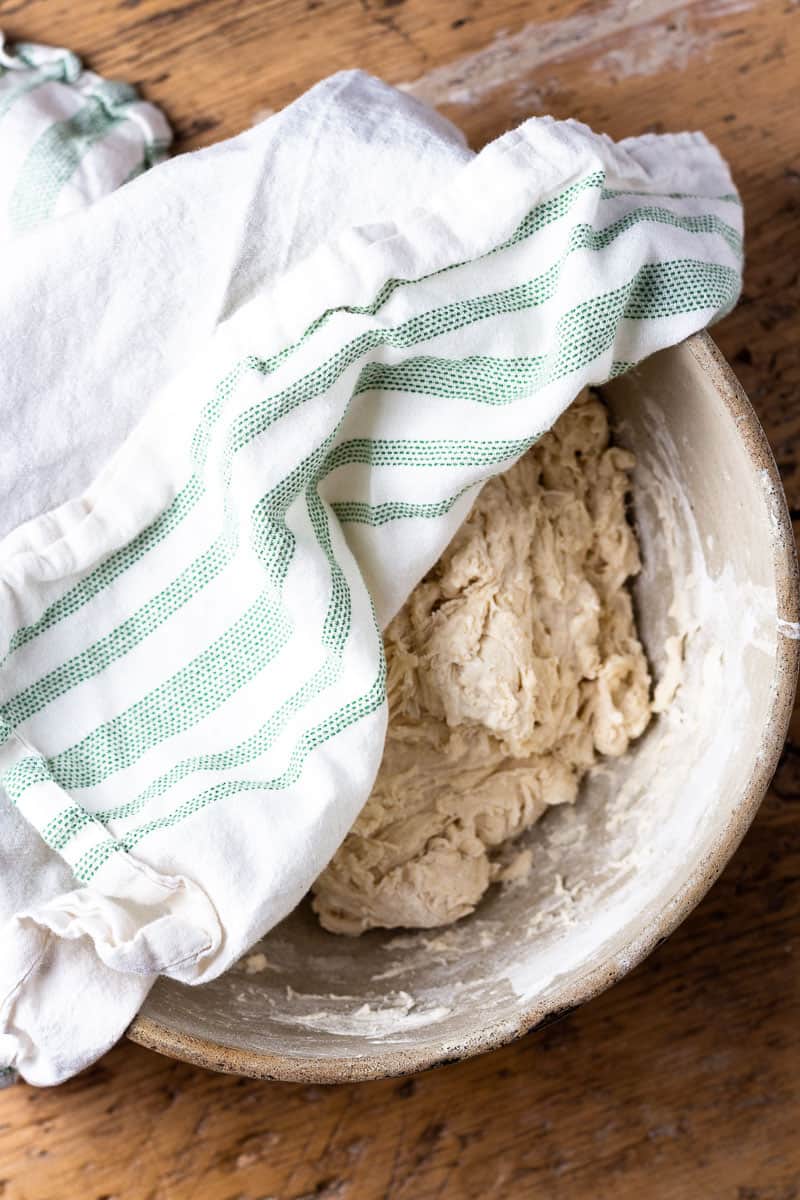
Step 4: Bulk fermentation.
Cover the dough and let rise at room temperature overnight until doubled in volume.
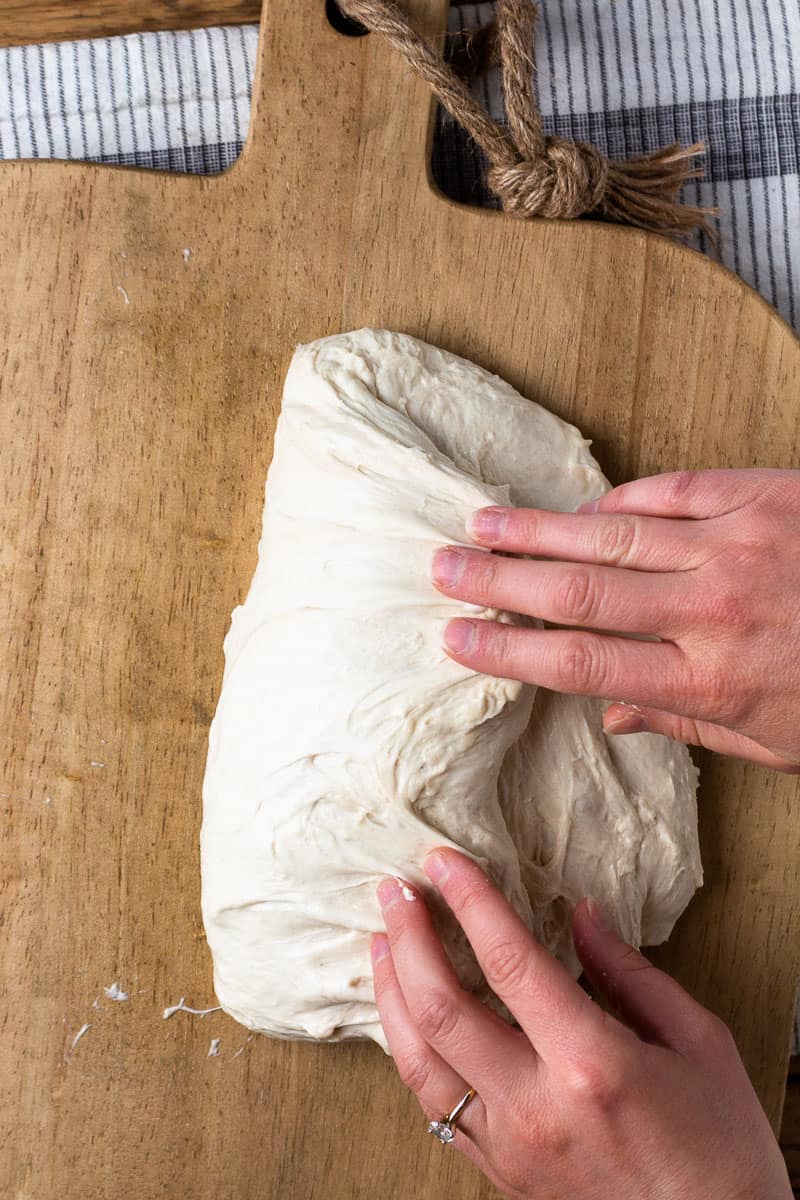
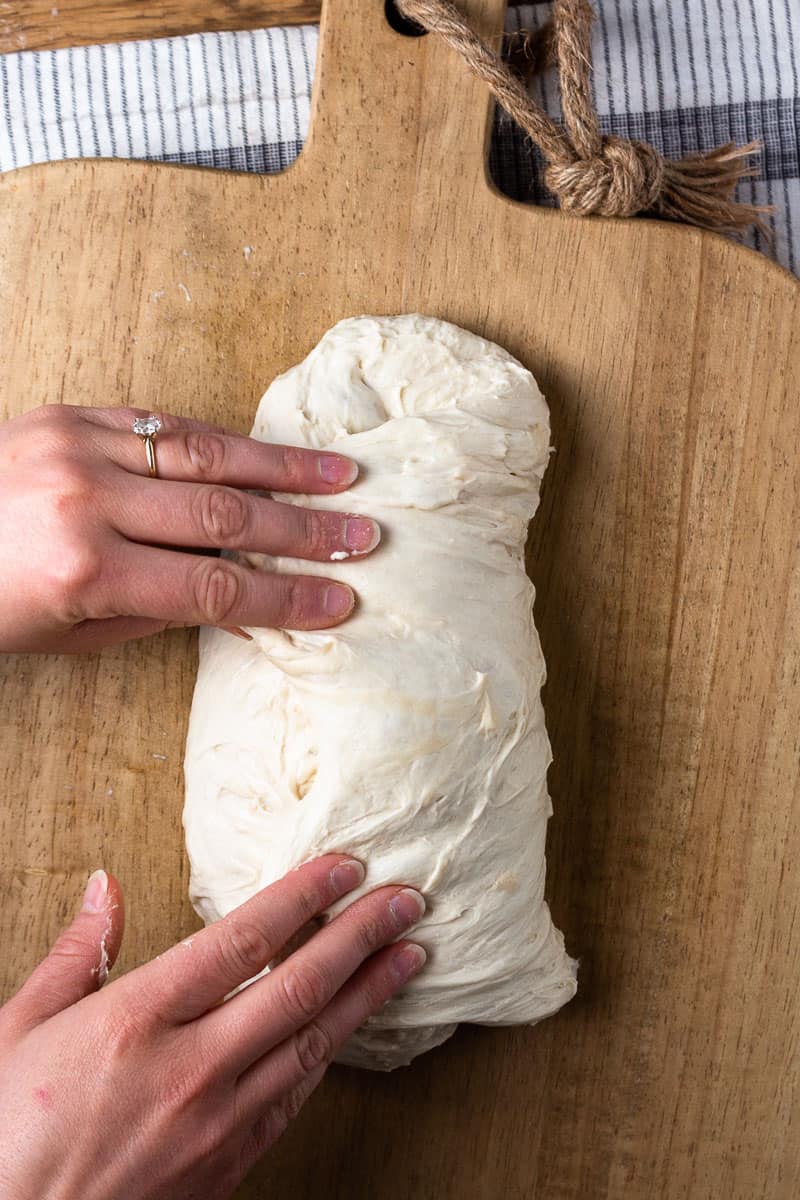
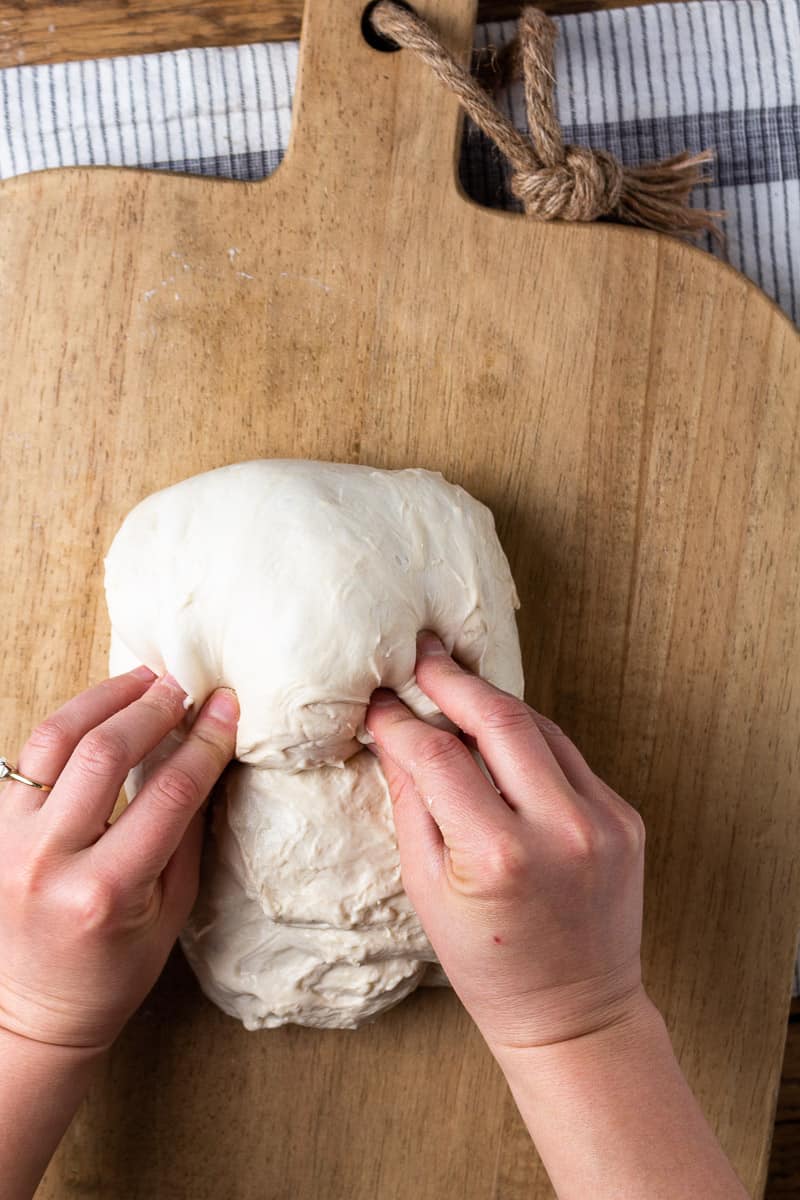
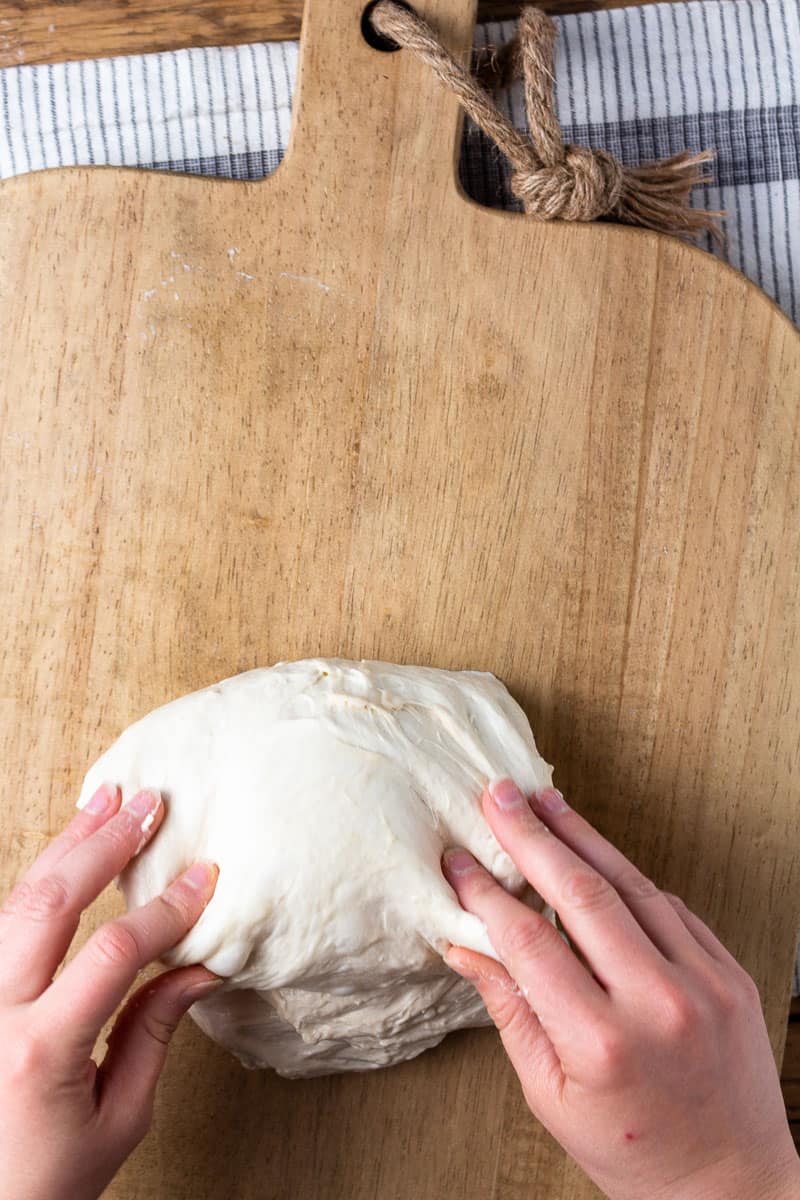
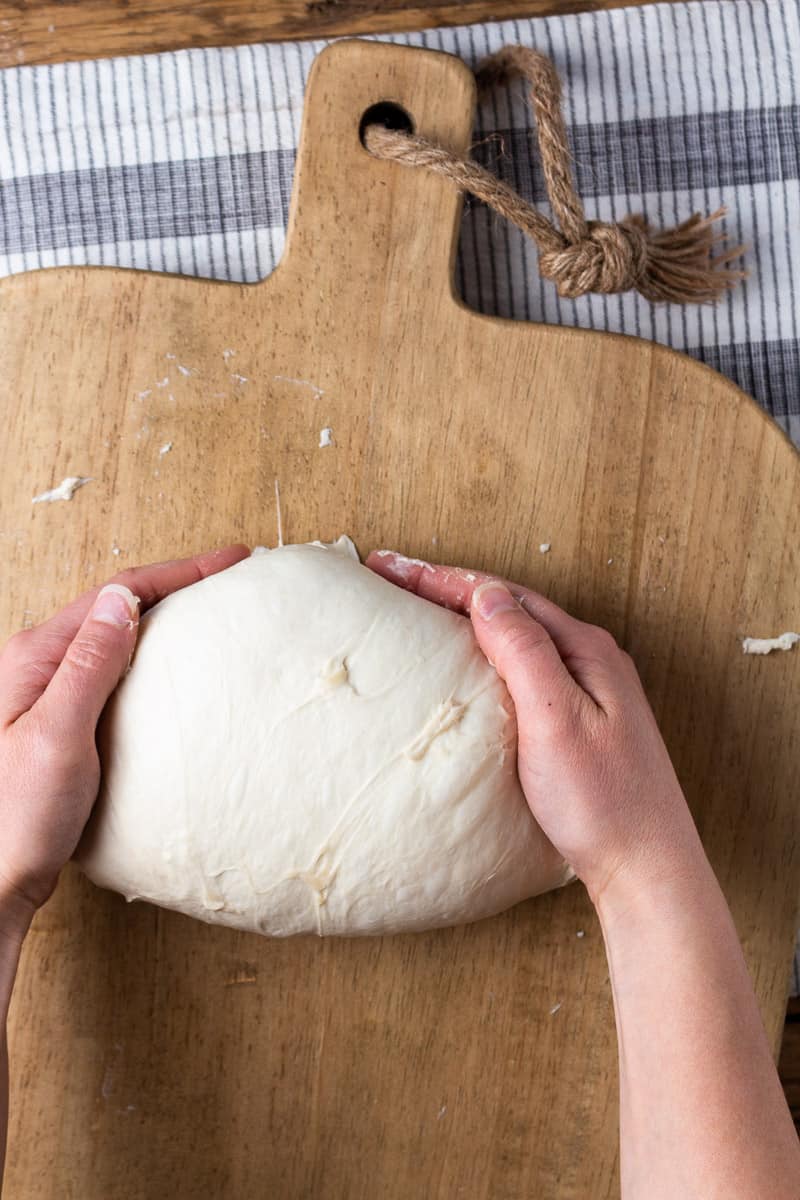
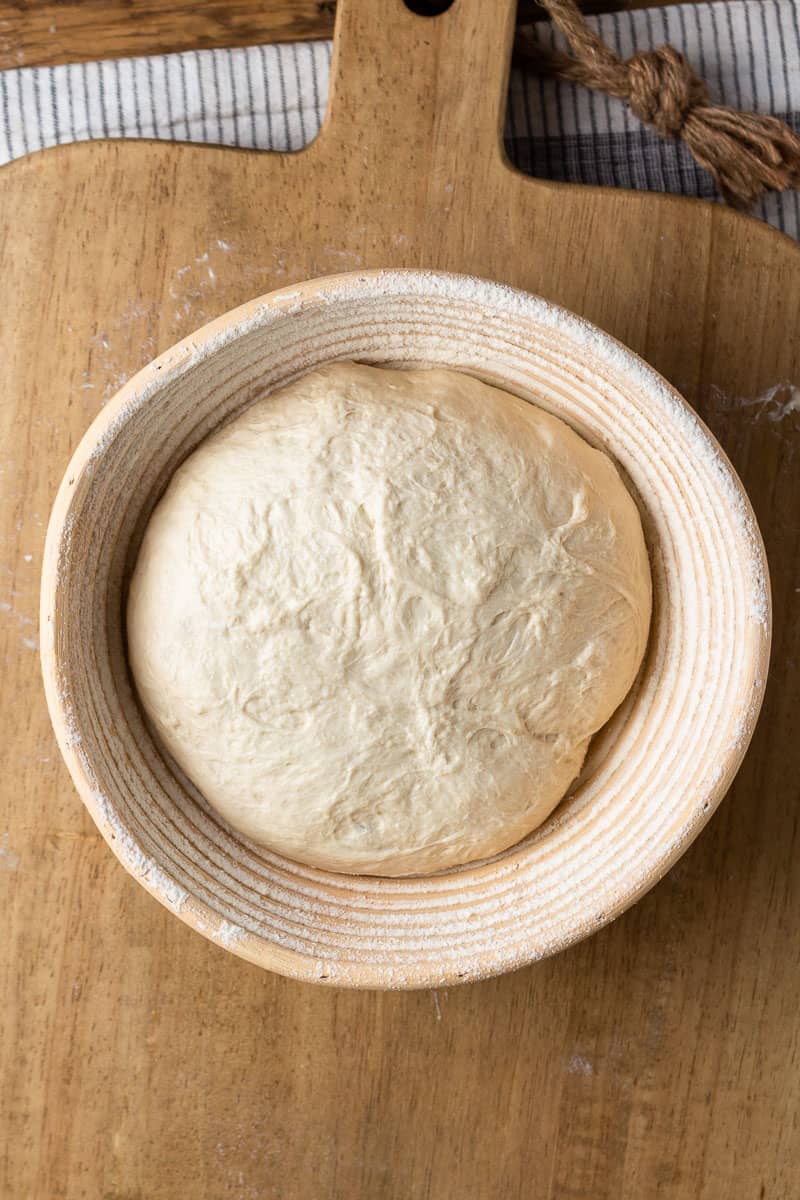
Step 5: Shape the dough.
Grab one side of the dough and fold it over the center. Do the same to the opposite side. Grab the top and loosely roll the dough over itself until you reach the bottom. Then use your hands or a bench scraper to push and pull the dough to create tension.
Step 6: Cold proof.
Place the dough seam side up (smooth side down) in a proofing basket. Cover with a towel and transfer to the fridge. Proof for at least 1 hour or up to 24 hours.
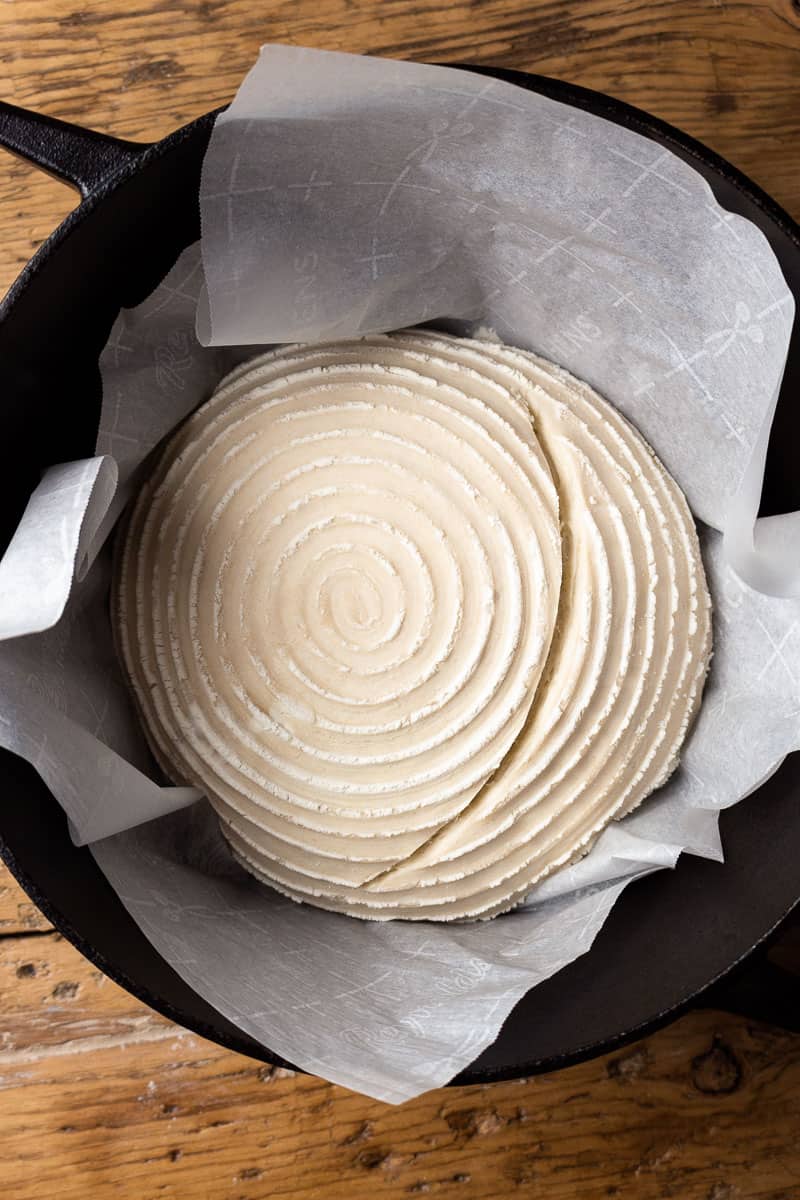
Step 7: Score + Bake.
Once the dough has proofed, flip the dough out onto parchment paper and score. Lift the parchment paper with the dough into a preheated dutch oven. Put the lid on and bake.
Frequently Asked Questions
When is my sourdough starter ready to use?
Your sourdough stater should double in size within 4-6 hours after feeding. You want to use the starter to make bread when it is most active, so once it has doubled in size.
Every time I feed my starter, I put it in a quart mason jar to easily track it's height. Most mason jars have measurement lines on the side. I make note of which line the starter is at after I feed it. Once it's doubled in size, it's ready to use! Alternatively, you can use a rubber band on any other tall sided vessel. Place the rubber band around the vessel it mark the height of the sourdough right after it was fed.
If your starter hasn't been fed in over one week or it's not doubling in size in 4-6 hours, I recommend feeding it twice before using it to bake bread. You can feed it in the morning and at night or two separate days. Then use the starter after the second feeding (if it rises in 4-6 hours).
When feeding my starter, I always mix together equal parts starter, flour and water. Typically, I use 100-120 grams of each.
If you want to double check that your sourdough starter is ready to bake with, you can drop a spoonful into a bowl of water. If it floats, the starter is ready to use.
How long does bulk fermentation take?
The amount of time needed for bulk fermentation depends on how much starter you use and the temperature of your kitchen.
I like schedule my dough so that bulk fermentation happens overnight. I typically use 75-100 grams of starter, and perform 2 hours of stretch and folds then let the dough rise (bulk ferment) from about 10pm - 7am, so about 9 hours, or however long it needs.
My kitchen is cold most of the year (Minnesota resident over here), usually about 68 degrees. During these cold months when my kitchen is below 70 degrees, I like to use 100 grams of starter for overnight bulk fermentation.
During the warmer months when my kitchen is above 70 degrees, the dough rises quicker due to the warmer, humid weather. If you live in a warm place or it's summer, I recommend trying 75 grams of starter for an overnight bulk fermentation.
How long does proofing take?
For this recipe, you'll cold proof in the fridge at least 1 hour, or up to 12-24 hours.
Even 1 hour of cold proofing will do wonders to help to improve the structure of the bread, but I do recommend a longer proofing, if possible!
What hydration should sourdough be?
Hydration is the ratio of flour to water. Higher hydration levels create bread with a more chewy, open crumb (those holes you see in sourdough bread). Lower hydration creates bread that more closely resembles sandwich bread.
Hydration levels are calculated by diving the grams of water by the grams of flour. This recipe calls for 375 grams of water and 500 grams of flour, so you take 375 and divide by 500, getting 75% hydration. This bread is higher hydration, making it a more traditional loaf of sourdough bread.
Higher hydration levels create a sticker dough that's a little more difficult to work with, but still easy enough for beginners!
Sourdough bread baking tips
- Kitchen scale. When it comes to sourdough bread making, you must use a kitchen scale. The flour and water measurements to be precise, and this is the only way to do it! You will find that using a kitchen scale is actually easier than measuring with a cup. MOST IMPORTANT: ZERO OUT THE SCALE. Before adding your next ingredient, always zero out the scale!!
- Bread flour. Bread flour works best for making sourdough bread. Its higher protein content gives sourdough a nice chewy texture, structure and height. However, when feeding my starter, I use organic all-purpose flour.
- Cold proofing for 12-24 hours. This may seem like an excessive amount of time, but it really does help with the flavor, texture and structure. If you are short on time, cold proof in the fridge for as long as possible before baking, even if it's just one hour.
- Dutch oven. Using a cast iron dutch oven is very important baking bread. Dutch ovens conduct even evenly, allowing the bread to bake evenly, and they also trap in steam that's released by the bread as it cooks.
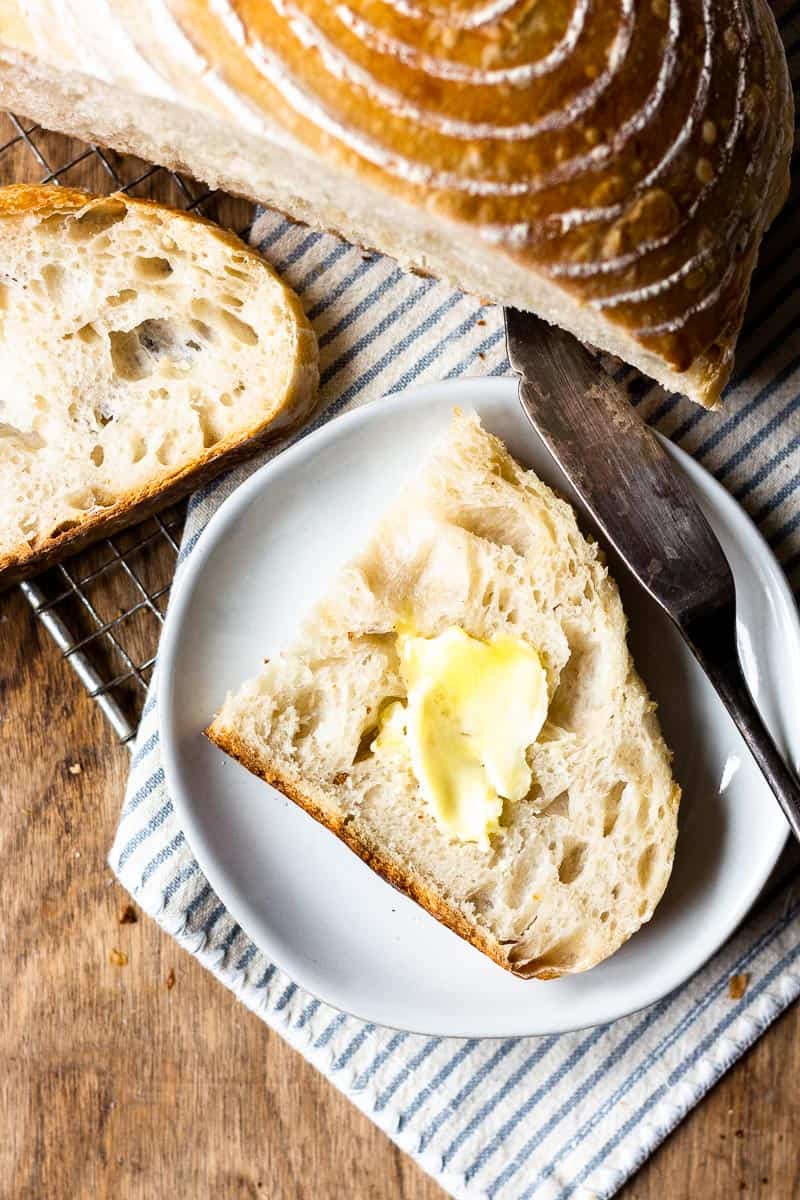
- Let cool before slicing. Please wait at least 1 hour before slicing into a fresh baked sourdough loaf!! Slicing into a warm loaf will cause the bread to become dense and gummy. If you wait until the bread cools before slicing, it will be light and fluffy. Trust me, it's worth the wait!
Troubleshooting
- Not rising? Make sure you're using sourdough starter at it's peak! Using a weak starter will prevent your bread from rising fully. If it's been more than 1 week since you last fed your starter, I recommend feeding it twice before baking bread. Your starter should double in size within 4-6 hours after feeding.
- Lacking flavor? Did you forget the salt? You would be surprised how much flavor salt adds to the bread. Do not skip or reduce the amount of salt!
- Burnt bottom? If your sourdough loaf is burning on the bottom, place a sheet pan or piece of tinfoil on the rack below the Dutch Oven. This prevents the heat coil on the bottom of the oven from sending heat straight up to bottom of the Dutch Oven. Also, make sure you're placing the Dutch Oven in the middle of the oven.
Storage
Room temperature
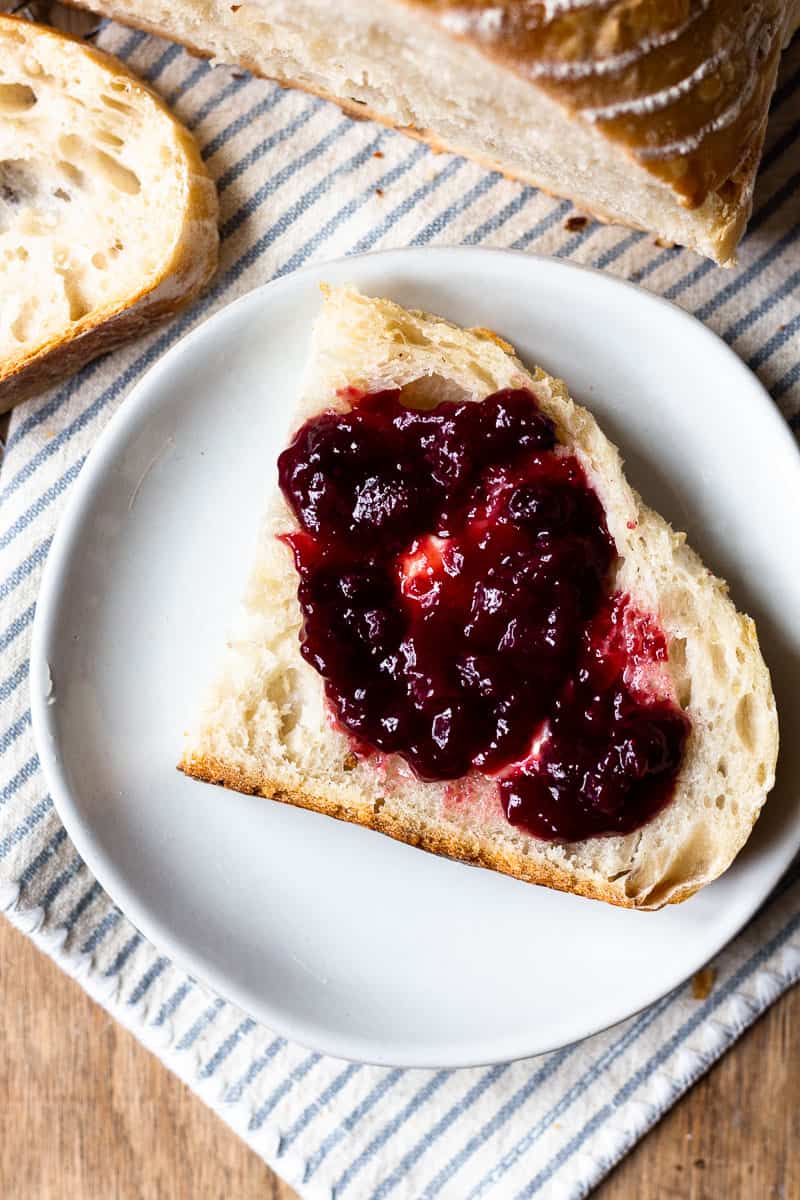
Once the loaf has been sliced into, store in an airtight bag for up to 5 days. After a couple days, I think sourdough bread tastes best lightly toasted.
Freezing
You can freeze sourdough bread in an airtight bag for up to 3 months. You can freeze the loaf whole or cut into slices first.
I like to slice the loaf, then I can just grab one or two slices at a time and pop them into the toaster to thaw and toast before eating.
To thaw a whole frozen loaf of bread:
- Preheat the oven to 350 degrees
- Remove the loaf from the freezer and bag
- Place the loaf directly on the center rack
- Bake for 20-30 minutes or until soft
- Let cool before slicing
Sourdough bread baking schedule
Figuring out how to time sourdough bread is honestly the hardest part about making it. But, don't panic. Sourdough is more forgiving than you may think.
Below is an example of a schedule that works well for me. Adjust the days to fit your schedule/needs, and remember that the times provided are not strict, just an example. Your times will change depending on how fast your starter rises, how long you do stretch and folds, and how long you cold proof.
If time allows, for the best results, perform stretch and folds for 2 hours and cold proof for 12-24 hours.
- Friday @ 12 pm: Feed your starter. Remove your starter from the fridge, and mix together equal parts starter, water and flour. Discard the remaining starter. I like to keep a discard jar in the fridge that I add to every week. Let your fed starter rise until doubled in size, about 4-6 hours.
- Friday @ 6:30pm: Mix the dough. You will mix part of your active starter with water, flour and salt. Return the remaining starter to the fridge.
- Friday @ 7pm - 9pm: Stretch & folds. Perform a series of stretch and folds every 30 minutes for 2 hours.
- Friday @ 9pm: Bulk fermentation. Cover the bowl with a kitchen towel and let rise overnight until doubled in size or close to. If it more than doubles, it will fine - the dough will just be sticker and a little more difficult to work with.
- Saturday @ 6-7am: Shape the dough. The dough will be loose and shaggy at this point. Shape the dough into a tight ball creating tension on the surface to hold it's shape.
- Saturday @ 7am: Cold proof. Proof the dough in the fridge for 12-24 hours (or at least 1 hour).
- Saturday @ 8am - Sunday 8am: Score + bake. Remove the dough from the fridge, score it and place into a hot preheated dutch oven, then bake it.
If you enjoyed this recipe, please leave a ⭐️⭐️⭐️⭐️⭐️ rating and a comment below! I'd love to hear from you! If you’re on Instagram, share a picture of the food you created and tag me at Modern Farmhouse Eats! I enjoy seeing all the pictures! 😊
Easy Sourdough Bread Recipe
Equipment
Ingredients
- 100 grams active sourdough starter
- 375 grams water
- 500 grams bread flour
- 12 grams salt
Instructions
Mix the dough
- If your kitchen is pretty warm, about 70 degrees or warmer, I recommend using only 75 grams of starter. In a large bowl, mix together the starter and water using a spoon or fork. Add the flour and salt and mix to combine until a shaggy dough forms. Cover with a towel and let rest for 30 minutes.
Stretch and fold
- Grab underneath one side of the dough and pull straight up to stretch the dough without breaking it, then fold over the center. Give the bowl a quarter turn then repeat again with the next side. Repeat this process until you've stretched and folded all 4 sides of the dough (think North, South, East, West). Cover with a towel and let rest. Repeat this stretch and fold process every 30 minutes over 2 hours, for a total of 4 times. The dough will tighten up as you go along. TIP: wet your hands with water to prevent the dough from sticking.
- NOTE: If you don't have time to stretch and fold for 2 hours, just do as many series of stretch and folds as you have time for.
Bulk fermentation (first rise)
- Cover the bowl with an air tight lid or plastic wrap then a towel. Let rise at room temperature for 8-12 hours, or until the dough has doubled or nearly doubled in size. Keep in mind, warmer weather will cause the dough to rise faster. If the dough more than doubles, it's not ideal, but it's OK - the bread will still turn out! The dough will just be a little sticker, making it slightly more difficult to work with.
- NOTE: Once you've tried this recipe, you can adjust the amount of starter to suit your needs. For example, for a faster rise, use 100 grams of starter, and for a slower rise, use 50 grams of starter.
Shape
- Use your hand to scrape the dough from the bowl onto a clean, dry surface. Shape the dough into a round ball by first folding it. To start, fold the left side of the dough over the center, then fold the right side over the center. Grab the top of the dough and fold over then center, then roll the dough down to the end.
- Using your hands or a bench scraper, push and pull the dough to create tension on the surface, this will help the dough hold it's shape.
Proof (second rise)
- Line a bowl or proofing basket with a towel and dust with flour (or you can dust the proofing basket directly). Transfer the dough to the bowl or proofing basket with the seam side up and smooth side down. Cover tightly with a towel and refrigerate for 12-24 hours, or at least 1 hour if you're short on time.
- NOTE: Refrigerating for 12-24 hours will yield the best results. Determine the length of time based on when you want to bake and eat the bread.
Preheat the oven
- Place a Dutch Oven with the lid on into the oven. Preheat your oven to 500 degrees.
Score
- Remove the sourdough from the fridge and remove the towel. Place a piece of parchment paper over the proofing basket or bowl, and place a plate over the parchment paper. With one hand on the plate and one hand on the bowl, flip the dough out onto the parchment lined plate. Gently remove the bowl, using your hands to help release the dough if it's stuck.
- Using a sharp knife, razor blade or bread lame, score the dough as you wish. I like to do one big slash down the left of right side of the dough or a simple X across the top.
Bake
- Remove the Dutch Oven from the oven and take off the lid. Grab the edges of the parchment paper and transfer it to the hot Dutch Oven. Cover and place back into the oven. Reduce the oven temperature to 450 and bake for 30 minutes. Remove the lid and bake an additional 10-15 minutes, or until the loaf is a deep golden brown color on top.
Cool
- Once the loaf has finished baking, remove from the Dutch Oven to cool. Let cool for at least 1 hour before cutting.
- NOTE: Cutting the bread too soon while it's still hot will result in tough, gummy bread. If you let it cool before slicing, the bread will be tender and light.
Nutrition
Nutritional information is automatically calculated by a third party software and is only an estimate, not a guarantee. This information is provided as a courtesy, and you are solely responsible for all decisions related to your health.
This post may contain affiliate links. Please see my privacy policy for details.


Jan
I did everything as instructed. Used bread flour. My dough was very sticky and hard to shape. After the cold fermentation the loaf was flat and still sticky. ???
Rachel Kochlin
Jan, I'm sorry your bread didn't turn out as hoped! How is your starter? Is it healthy and active, and was it at peak when you made the bread? A weak starter could be the culprit. Another possible issue is that the dough was over-proofed. You want the dough to no more than double, otherwise it can be quite sticky. This sourdough recipe was my original go-to recipe that can be made overnight, and many people love it, but I have since changed my method a bit. I shared my updated sourdough recipe on my website, as well. Search for "Easy Everyday Sourdough Bread" - it has a shorter rise time and might work better for you! Please let me know if any of this was helpful!